Wednesday, August 20, 2008

How do I – Solve the “Could not create type WebService.Name” error when trying to deploying a web service?

OK, so you wrote a web service and you may even have tested it and everything worked fine. So the you did some "cleanup" and tried to deploy the web service. It compiles and deploys just fine, but when you try to invoke and hit the service you are presented with the following error:

Server Error in '/' Application.

Parser Error

Description: An error occurred during the parsing of a resource required to service this request. Please review the following specific parse error details and modify your source file appropriately.
Parser Error Message: Could not create type 'WebServices.Candidates'.
Source Error:

Line 1: <%@ WebService Language="C#" CodeBehind="Candidates.asmx.cs" Class="WebServices.Candidates" %>

Source File: /Candidates.asmx Line: 1

So just how do you solve this problem?

Here's my checklist of things to check when having trouble deploying web services:

  1. Check that IIS is using ASP.NET 2.0.

    1. Begin by starting up the Internet Information Services manager.
    2. Expand "Web Sites".
    3. Expand your web site e.g. "Default Web Site".
    4. Locate the Virtual Directory to which the web service was deployed and right click it.

    1. On the popup menu, click "Properties".
    2. On the Properties window, select the "ASP.NET" tab.
    3. Ensure that the APS.NET Version is set to 2.0.x and not 1.1.x.
    4. If it is set to 1.1.x, set it to 2.0.x and retry your web service.
  2. Ensure your Visual Studio build properties are set correctly.

    1. Locate the .asmx file in your Solution Explorer pane and right click it.

    1. On the popup menu, click "Properties".
    2. Ensure that the Build Action is set to "Content".

    1. Locate the code behind (.cs or .vb) file in the Solution Explorer and right click it.

    1. On the popup menu, click "Properties".
    2. Ensure the Build Action is set to "Compile".

    1. If either of these weren't set correctly, make the correction, recompile, redeploy and retest.
  3. Ensure ASP.NET 2.0 is an Allowed web services extension.

    1. Open the IIS Manager.
    2. Expand your computer.
    3. Click the "Web Service Extensions" option.
    4. In the right hand pane, locate the "ASP.NET v2.0.x" entry and ensure that its Status is "Allowed". If it is not allowed, the "Allow" button on the left will be enabled. Click it to change the setting.

    5. If it was not allowed, correct the setting and retry your service.
  4. Check for the WebMethod attribute.

    1. Review your code and ensure that you have the [WebMethod] attribute set for all web methods in the service. This does not mean that all methods have to be web methods, but the ones you are trying to consume should have this attribute in its declaration.

  5. Ensure the .asmx and code behind file match definitions.

    1. Open your code behind (.cs or .vb) file.
    2. Look at the web service declaration at the top.

    1. In our example, ensure that #2 and #3 match. If they don't, correct the problem.
    2. Next note the namespace at #1.
    3. Now open the .asmx file. This can usually be done by double clicking it in the Solution Explorer, but if you're not able to get it to open through the IDE, open Windows Explorer, navigate to the file, right click it and select Open in Visual Studio to work around the problem.
    4. Now look at the code.

    1. Note the value of Class in this case is "WebServices.Candidates". The Class value should be the full namespace value as well as the class name. Given our code behind file's values, in this case, the Class value should have been "Crowe.PartnerNomination.WebServices.Candidates", but instead it is just "WebServices.Candidates". This is a common issue when reworking already written web services into a namespace hierarchy. For some reason the .asmx file does not always reflect the changes made which then causes the error message at the beginning of this post.
    2. Change the Class value, recompile, redeploy and retest.

    Taken from: http://www.cjvandyk.com/blog/Lists/Posts/Post.aspx?ID=133
Tuesday, August 5, 2008

Visual Studio 2005 Tools for Office, CommandBarButton FaceId Property

From http://www.kebabshopblues.co.uk/2007/01/04/visual-studio-2005-tools-for-office-commandbarbutton-faceid-property/
I recently started experimenting with Visual Studio 2005 and Visual Studio Tools for Office (VSTO) 2003. This entry is a technical .Net / VS2005 / VSTO blog and will probably not be of interest unless you use these tools yourself.

Yuck. Office applications allow many configuration / add-in options programmatically which are quite impressive, but do not sit well with other .Net development tools. For example, in Forms development, if we want to create a Button on a form programmatically, we declare a new Button(). In VSTO, we declare a new CommandBar, and then have to use the CommandBar.Add() method to create a new button on that toolbar.

One of the first things that I wanted to achieve - after adding a basic toolbar to Outlook 2003, was to add buttons with icons. It was frustrating that this was a topic that seemed to be omitted from the book ‘Visual Studio Tools for Office: Using C# with Excel, Word, Outlook, and Infopath’ (Carter and Lippert), and it almost entirely eluded me as to how to do it. There was the CommandBarButton.FaceId property, useful if you wanted a preset icon on your button (but no apparent documentation of what numbers should be used for which icons). Then there were the Picture and Mask properties that appeared to have relevance to this task, but I could not fathom how to use them. Web searches demonstrated some approaches, even on MSDN, that required the use of the clipboard to load an image; something that could muck up the user’s clipboard and therefore highly undesirable, it seemed to me.

Anyway, I finally found what I needed, on MSDN itself. This was one occasion when a generic web search with Google did not outperform Microsoft’s own site (prior poor recommendations that I had found turned out to refer to previous versions of .Net or VSTO).

But still in all my searches I failed to find documentation of the simplest way of assigning an icon to a button or menu entry, using the FaceId property. Possibly, I missed it; that would be easy in amongst the morass of documentation.

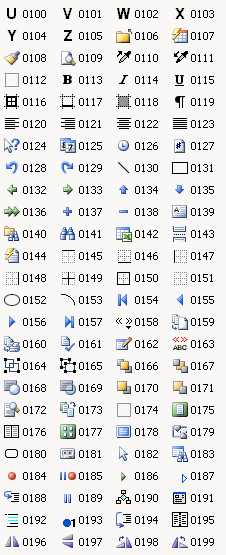
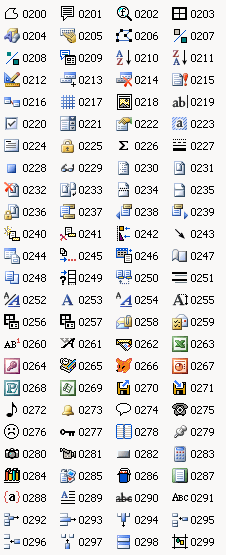
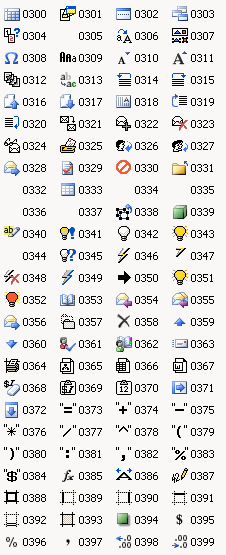
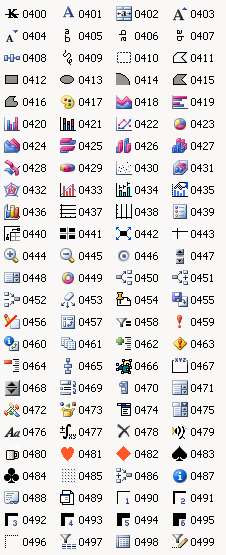
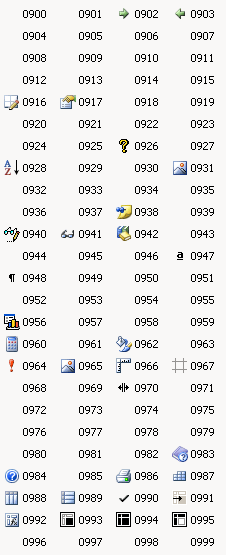
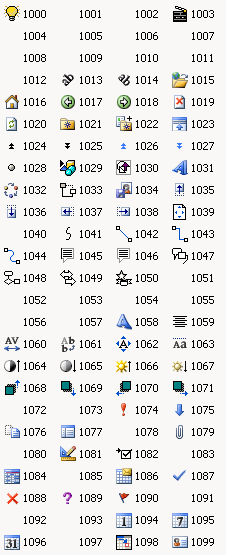
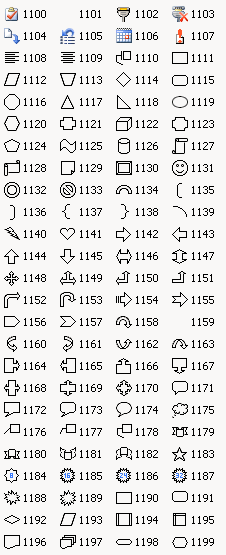
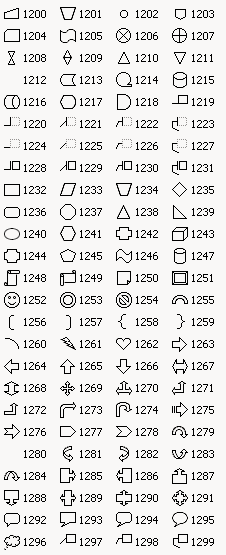
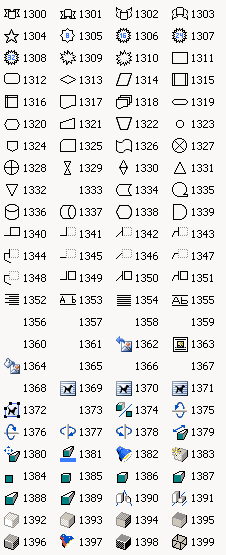
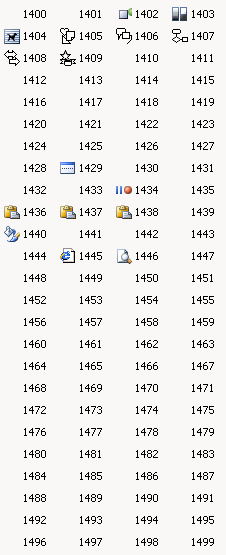
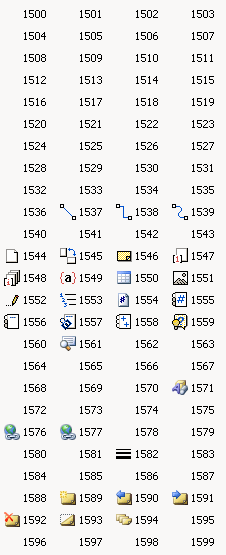
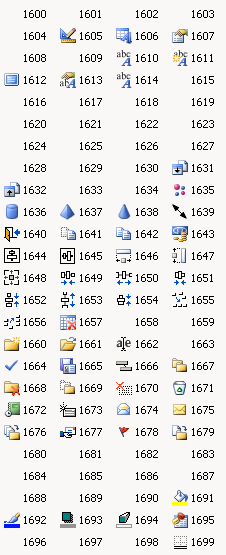
This blog documents the numbers and associated icons as discovered from using the various FaceId numbers in Outlook. I have not yet cross-checked the icon numbering with different applications. Lower down this page, I’ll comment briefly on how I got these images later in the document.

The Icons

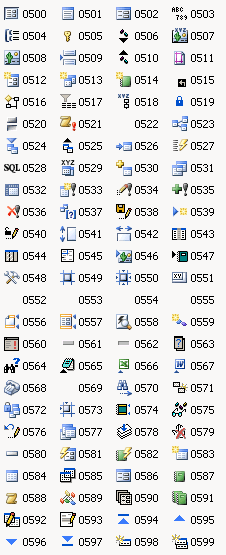
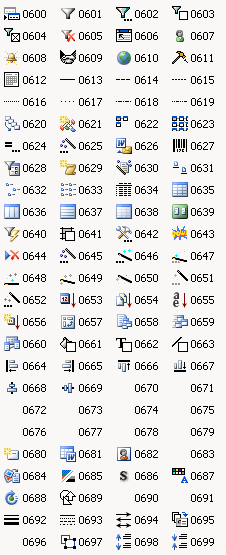
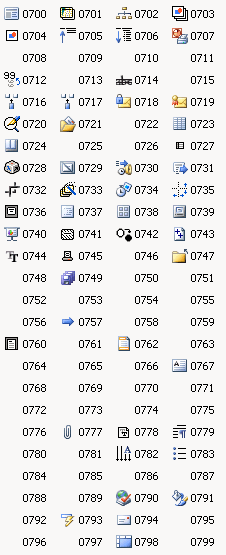
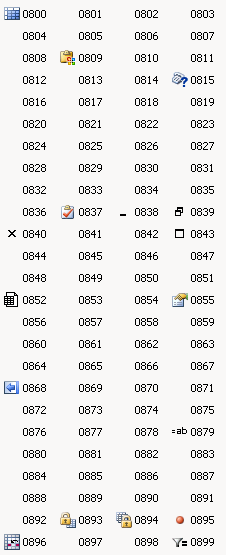
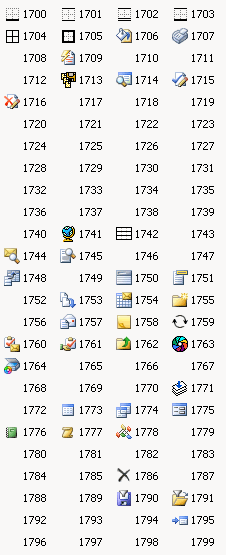
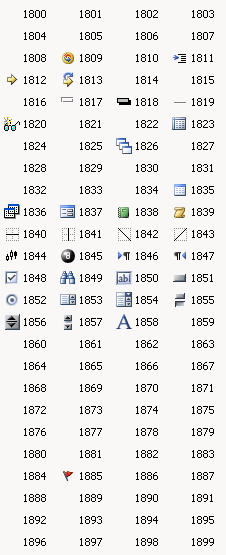
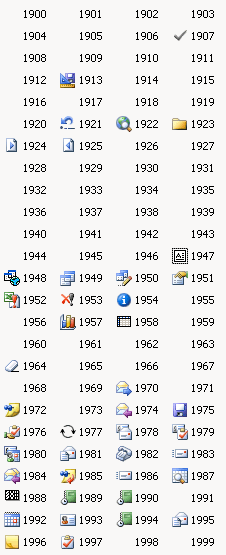
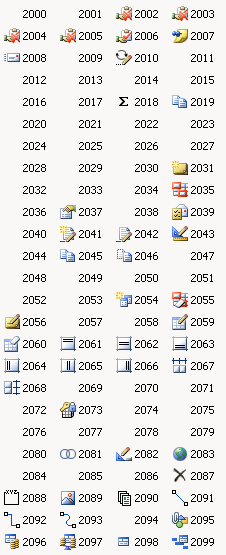
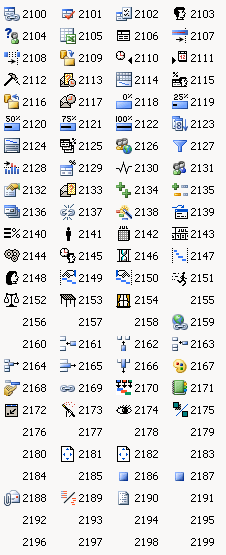
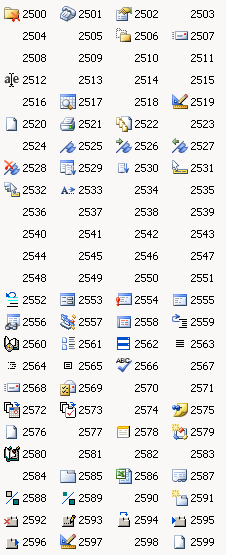
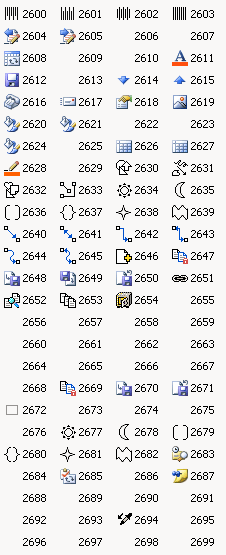
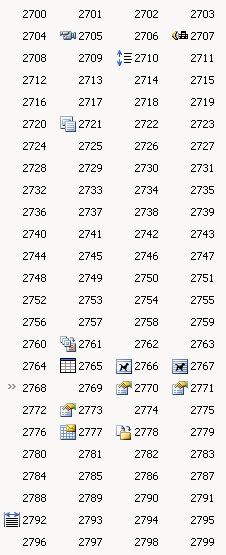
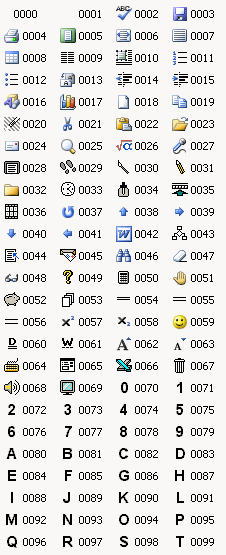
The number to the right of the icon is the appropriate FaceId to use:

0000-0099

0100-0199

0200-0299

0300-0399

0400-0499

0500-0599

0600-0699

0700-0799

0800-0899

0900-0999

1000-1099

1100-1199

1200-1299

1300-1399

1400-1499

1500-1599

1600-1699

1700-1799

1800-1899

1900-1999

2000-2099

2100-2199

2200-2299

2300-2399

2400-2499

2500-2599

2600-2699

2700-2799

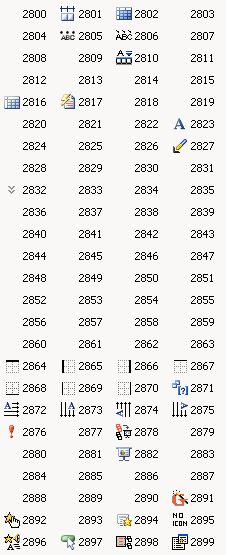
2800-2899

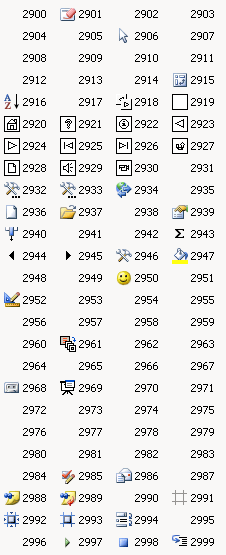
2900-2999

How I Made These Images

MSDN Support had a very tempting page which refers to ‘Finding FaceID Numbers for Your Microsoft Office 97 Toolbars’; but that text is not linked and does not retrieve anything on a search; though the text suggests that it (should have been) a tool to provide documentation of these FaceId’s in an Excel spreadsheet. Tempting, therefore, but fruitless (even if it referred to past versions, perhaps it might have helped?)

So, I wrote a little piece of code to create an Outlook toolbar with 104 buttons (the first 4 buttons being repeated, so there were 100 unique faceId’s), each with a FaceId and a text caption of the number used to achieve the icon. Making the Outlook window very narrow (so only the first four buttons were displayed) meant that clicking on the toolbar expansion button gave a drop-down with 100 unique buttons on. A bit of jiggery pokery with a screen-shot gave the necessary images. It was a pain to be such a manual process, but there you go; sometimes these things can’t be helped… I did decide to stop at 2999 though ;)

Maybe my OCD will cut in soon though and compel me to find the last icon…

[Added 24/1/07: I have now added a post with FaceId’s 3000 - 3999 for your enjoyment.]